
Shopify Integration
The Shopify Connector pulls the orders from Shopify and creates Sales Order against them in Bravo Hub ERP.
While creating the sales order if Customer or Item is missing in Bravo Hub ERP the system will create new Customer/Item by pulling respective details from Shopify.
How to Setup Connector?
Section titled “How to Setup Connector?”Shopify Connector is moved out from Bravo Hub ERP and available through a Bravo Hub App on Bravo Hub Cloud Marketplace
Note to users of old Shopify Connector
Section titled “Note to users of old Shopify Connector”If you have not setup Shopify Connector on your Bravo Hub ERP site you can proceed to next step.
If you are using old Shopify integration that’s provided in Bravo Hub ERP then you will have to disable the connector before proceeding. After installing the app, it will migrate existing data e.g. unique product_id for items to separate doctype. Once you are done configuring new integration, you can confirm the status of migration by going to “Ecommerce Integration Log” doctype.
App Installation
Section titled “App Installation”- If you are hosting your Bravo Hub ERP site on Bravo Hub Cloud, you can quickly install the app by going to your site Dashboard. The app is available in Bravo Hub Cloud Marketplace
- If your site is hosted by Bravo Hub, please raise a support ticket to get the app installed on your site.
- If you are self hosting Bravo Hub ERP you can install the app using Bravo Hub bench. Refer bench documentation for installing Bravo Hub Apps.
bench get-app ecommerce_integrations --branch main
The repository for app is hosted on GitHub: [http://github.com/frappe/ecommerce_integrations/3
Create A Custom App in Shopify
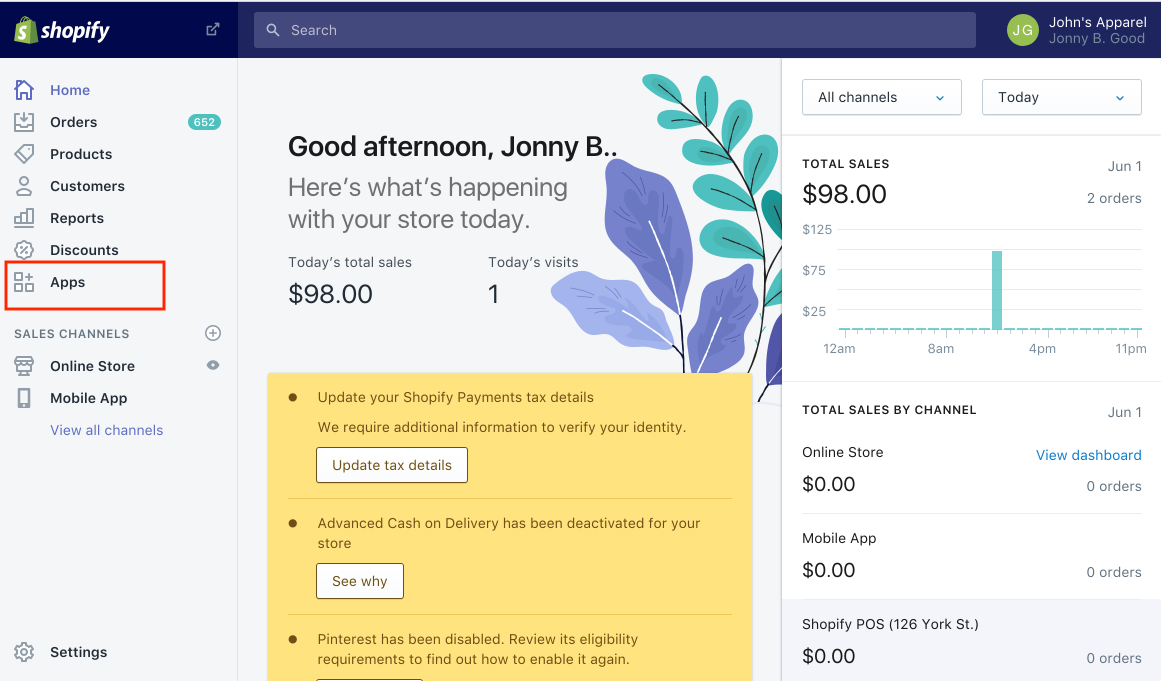
Section titled “Create A Custom App in Shopify”- Click on Apps in menu bar
- Click on Develop apps for your store to create custom app

- Create New app
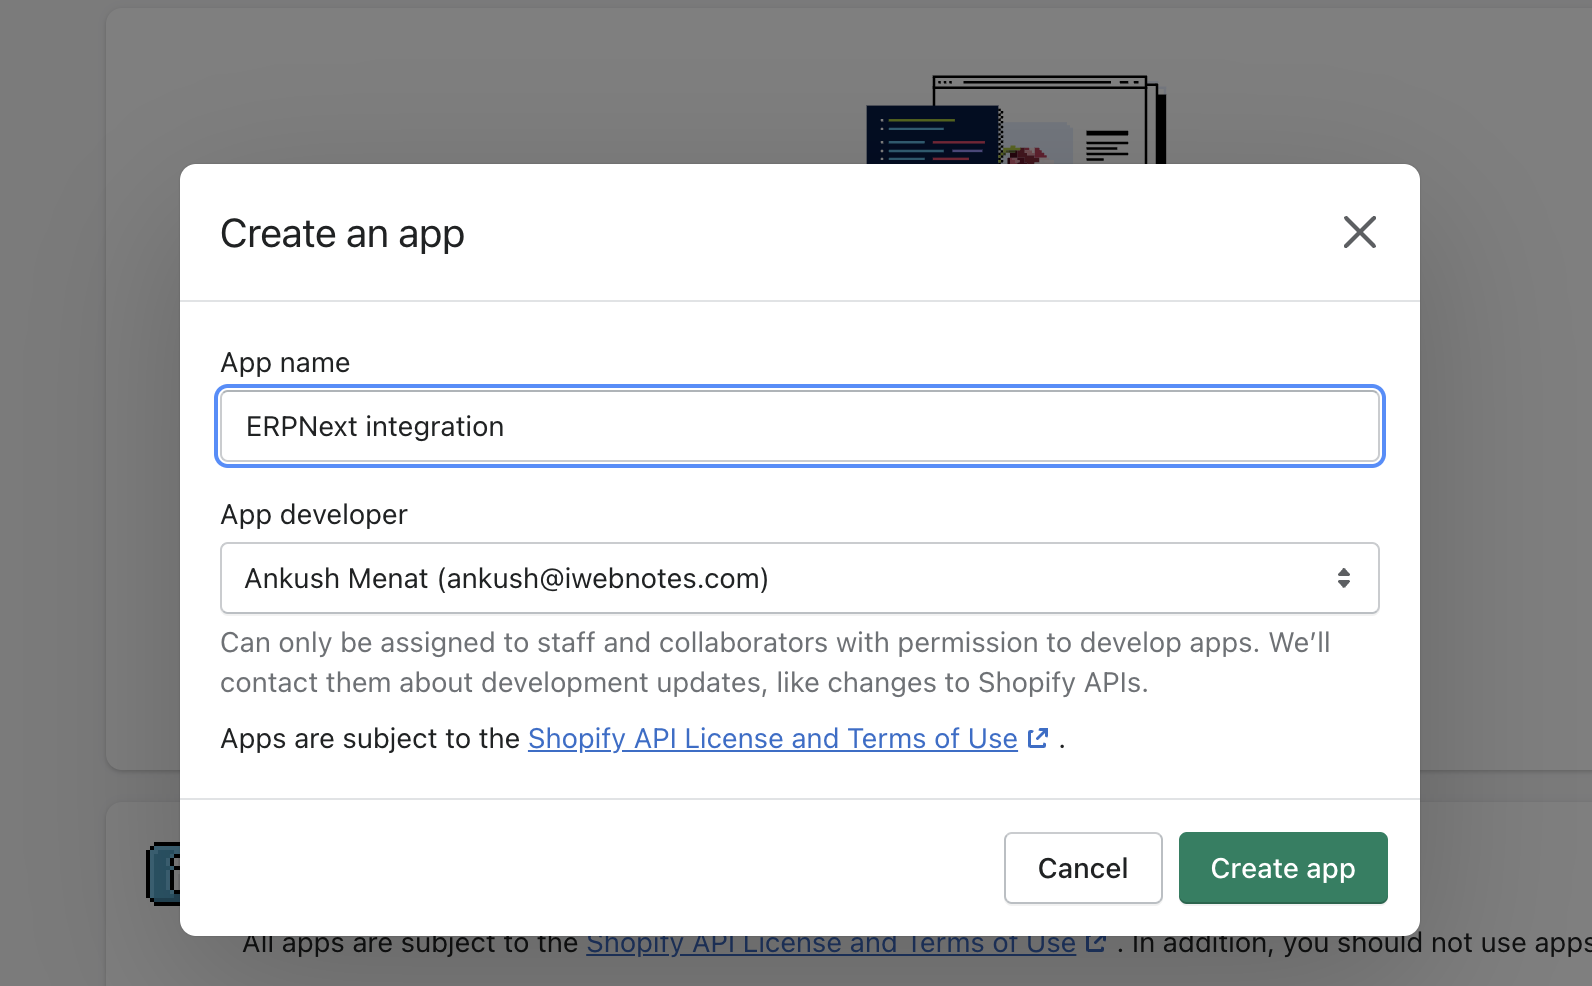
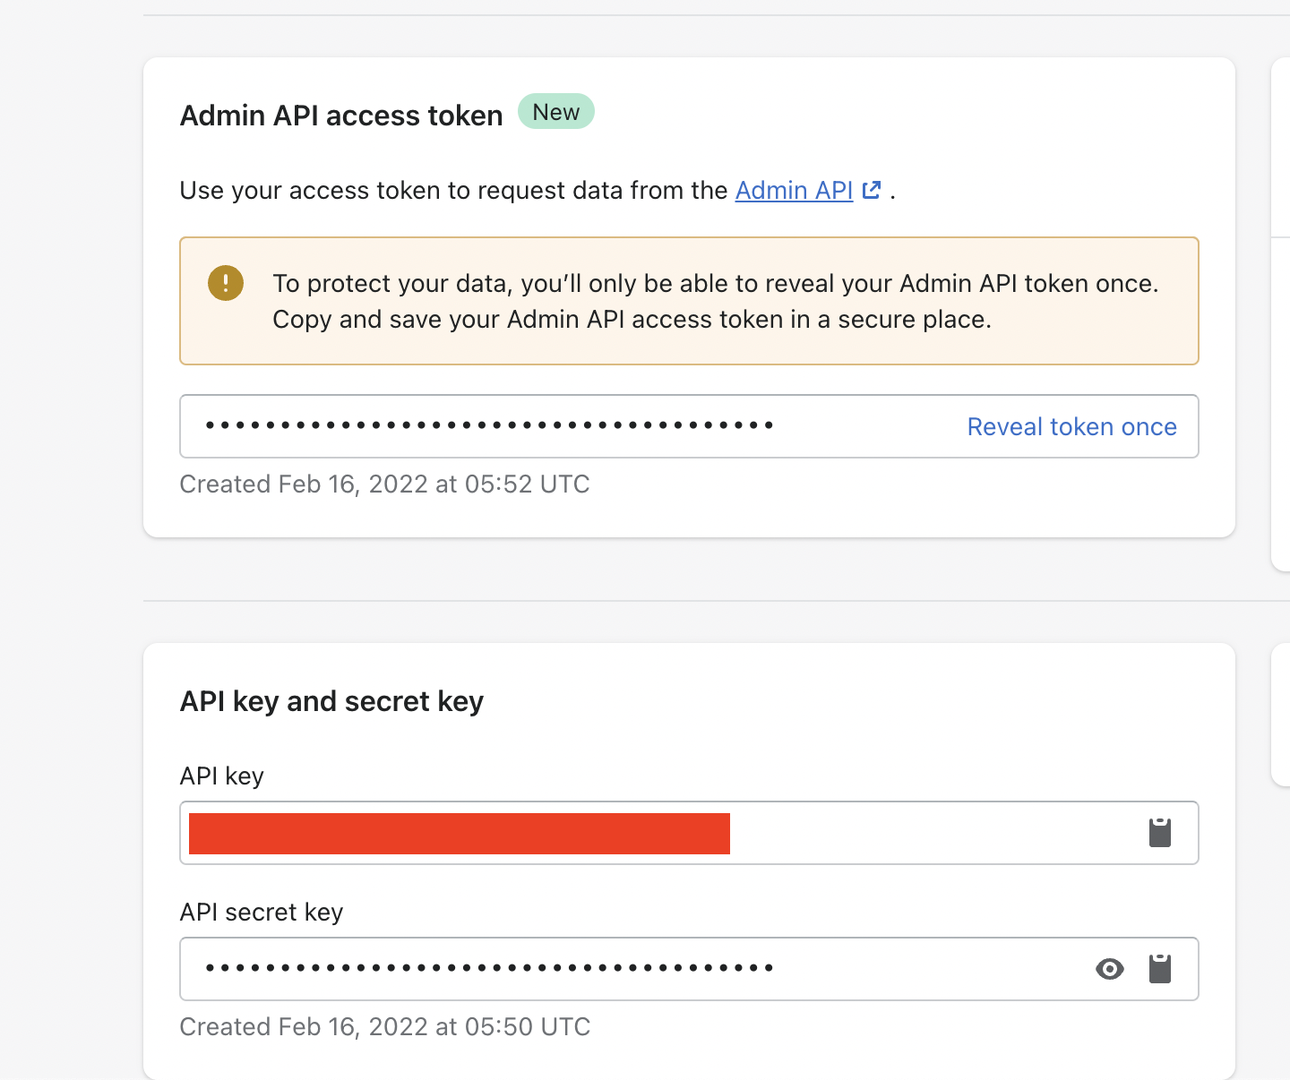
- Fill up the details and create app. The each app has its own API key, Password and Shared secret
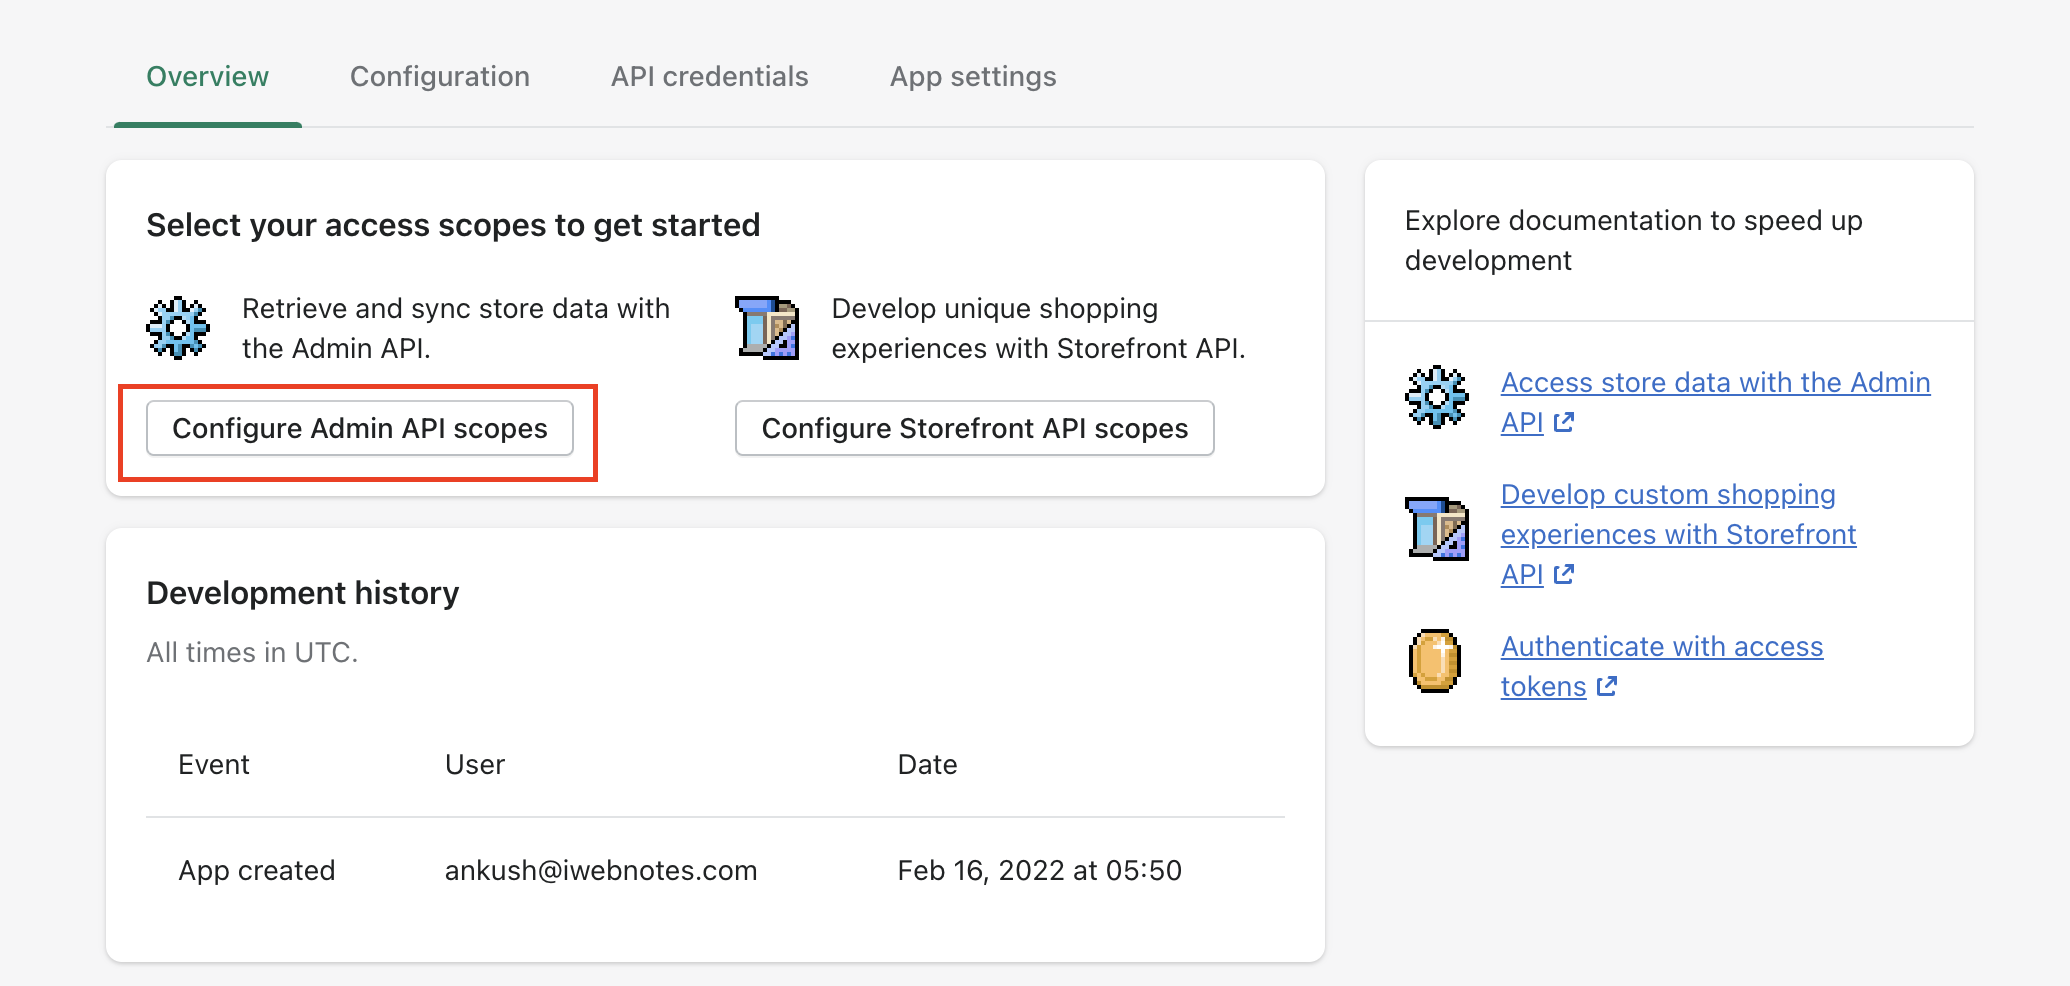
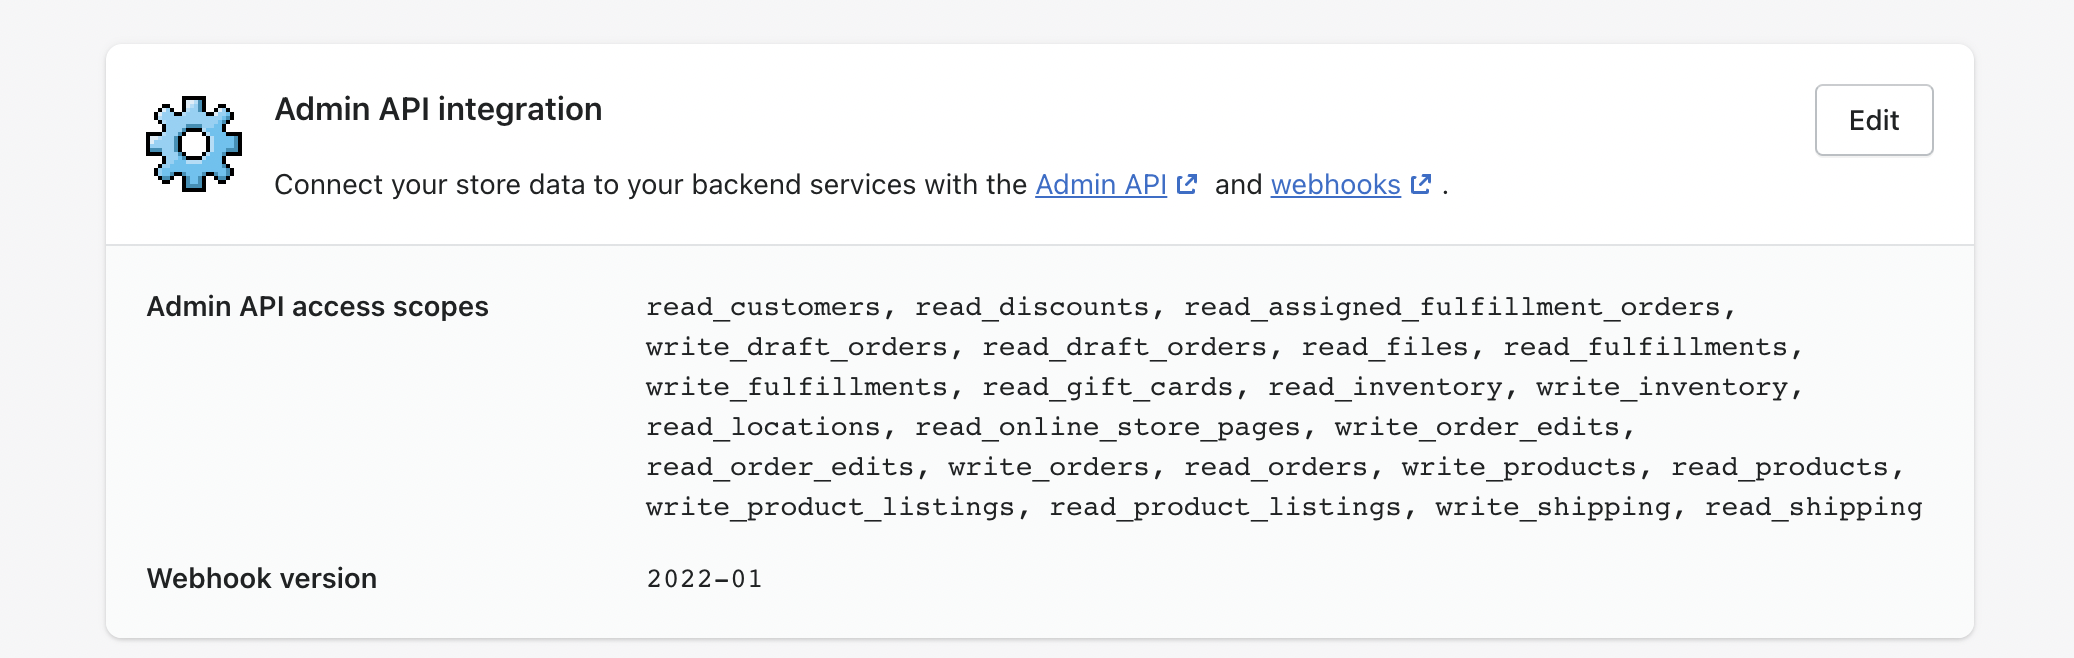
- Allow following permissions to the app.
- Draft Orders - Read and Write
- Orders - Read and Write
- Location - Read
- Customers - Read
- Assigned fulfillment orders - Read and Write
- Products - Read and Write
- Product listings - Read and Write
- Inventory - Read and Write
your final admin scopes should look like this:
- Install the app on your site
Setting Up Shopify on Bravo Hub ERP:-
Section titled “Setting Up Shopify on Bravo Hub ERP:-”Once you have created a Private App on Shopify, setup App Credentials and other details in Shopify Settings in Bravo Hub ERP.
To access Shopify Settings, go to: Awesome search bar > Shopify Setting
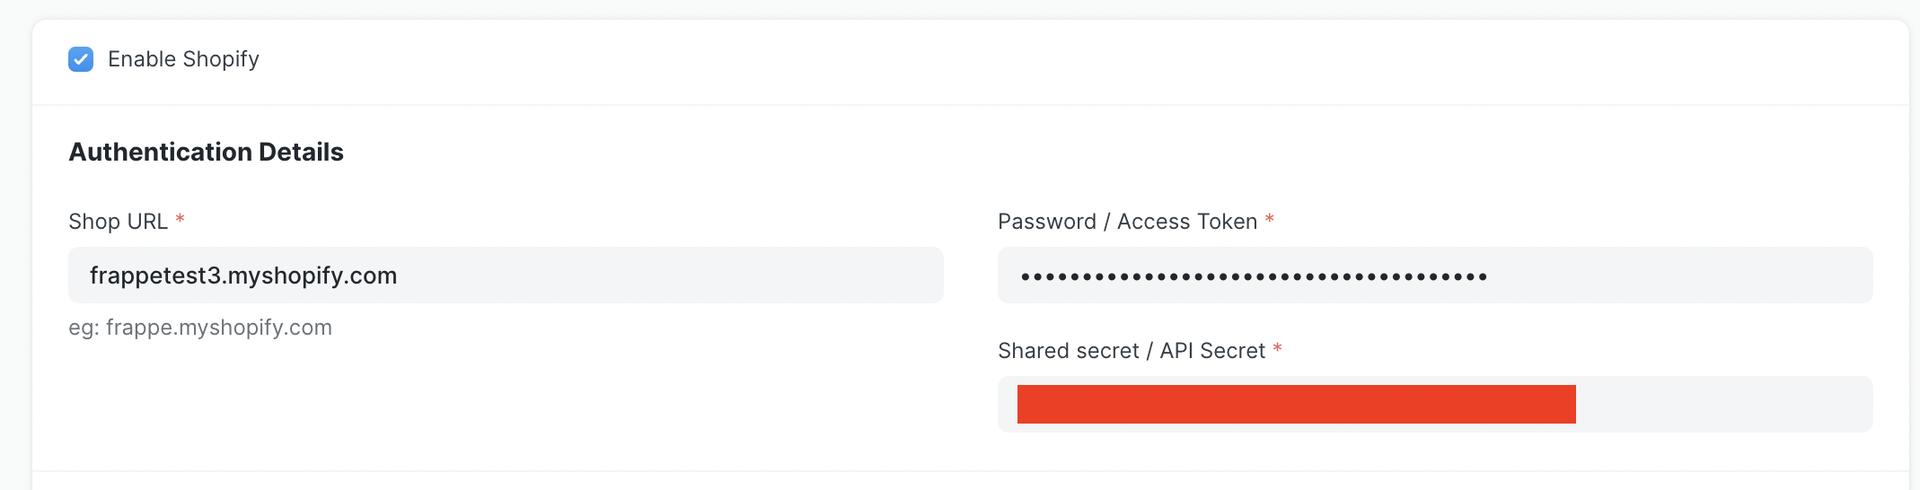
- Fill-up Shopify site URL, Access Token and API Secret from Shopify’s Private App.
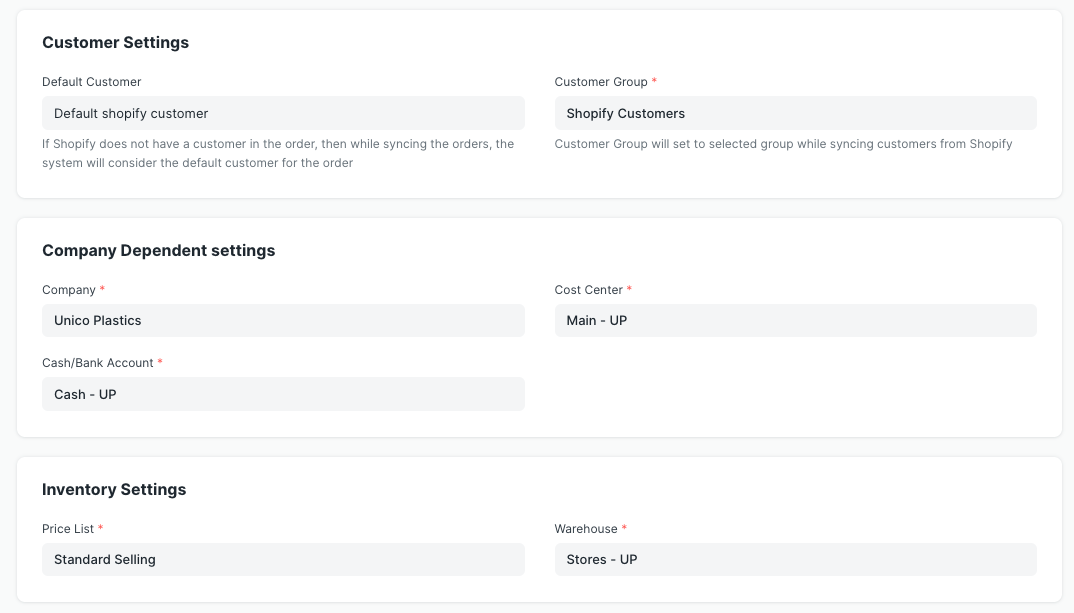
- Setup Customer, Company and Inventory configurations.
- Setup Sync Configurations.
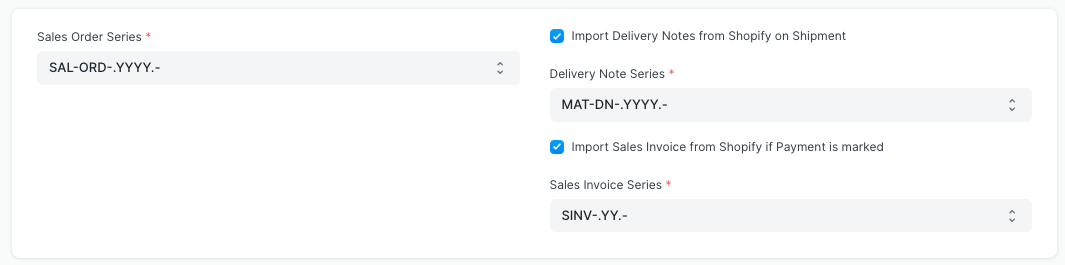
The system pulls Orders from Shopify and creates Sales Order in Bravo Hub ERP. You can configure Bravo Hub ERP system to capture payment and fulfilments against orders.
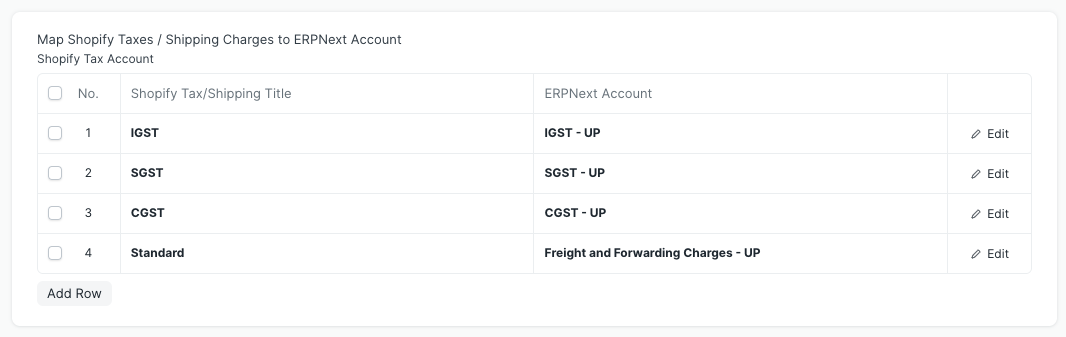
- Setup Tax Mapper.
Prepare tax and shipping charges mapper for each tax and shipping charge you apply in Shopify. You can find name of your taxes from your Shopify Admin page.
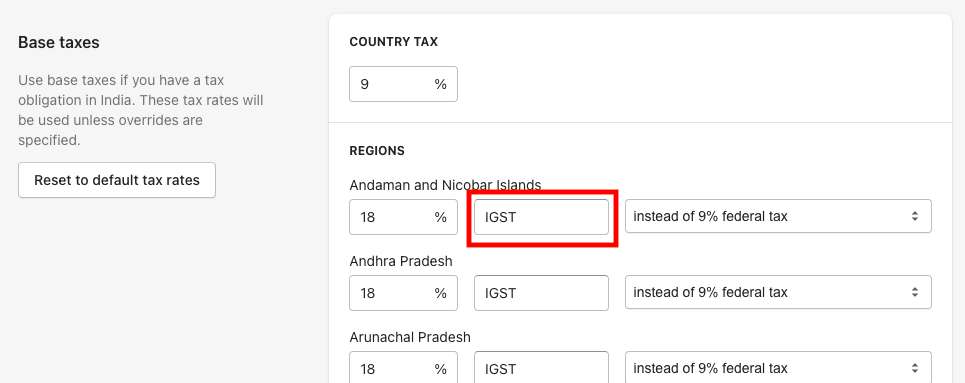
After setting up all the configurations, enable the Shopify sync and save the settings. This will register the API’s to Shopify and the system will start Order sync between Shopify and Bravo Hub ERP.
Syncing Old Orders From Shopify
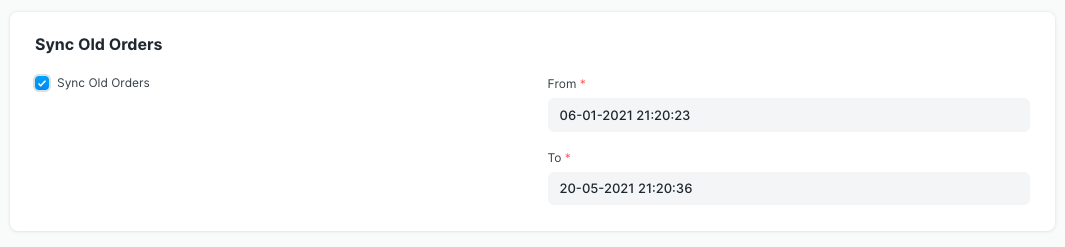
Section titled “Syncing Old Orders From Shopify”Once you are done with the Shopify configuration and have enabled Shopify Syncing, you also get a provision to sync your old orders from Shopify into Bravo Hub ERP. This syncing will happen in background and can take few hours depending on number of orders you have.
- Enable “Sync Old Shopify Orders”
- Enter the From and To dates between which the orders need to be synced
Inventory Sync
Section titled “Inventory Sync”You can update your inventory with Shopify for items that are synced from Shopify. Inventory sync is done every hour with a scheduled job. Inventory levels of items that have changed since last sync are pushed to Shopify. Inventory levels of Bravo Hub ERP warehouses are mapped 1 to 1 with Shopify locations.
- To enable inventory sync click on the checkbox, this will show you a table to map Bravo Hub ERP warehouse with Shopify Location.
- Select sync frequency. 30 to 60 minutes is recommended frequency.
- Click on “Fetch Shopify Locations” button to populate Shopify locations in the table.
- Link each location with Bravo Hub ERP warehouse.
- Save the settings.
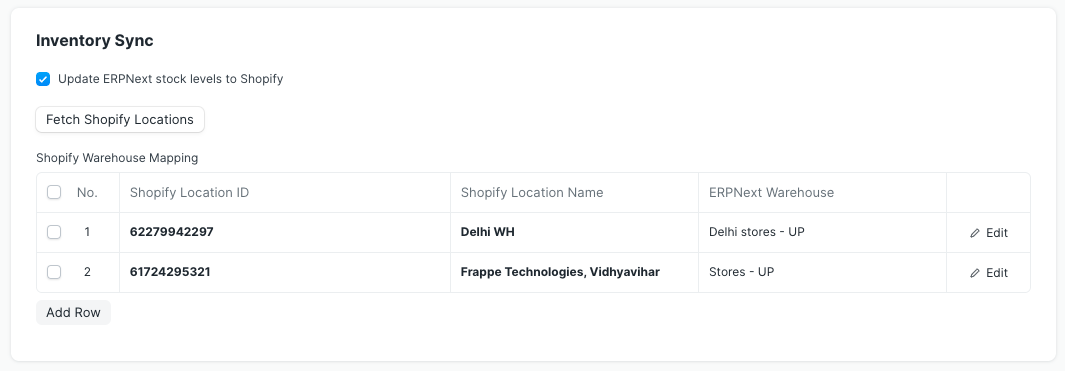
Note: This connector assumes that Bravo Hub ERP is main source of information about inventory levels, any changes done to Shopify inventory levels will be overwritten by Bravo Hub ERP if Bravo Hub ERP inventory levels change.
Note: Shopify does not support fractional quantity. If fractional quantity is found in Bravo Hub ERP, the inventory level on Shopify will be set by rounding it down to nearest whole number.
Item Sync
Section titled “Item Sync”You can enable sync of new Bravo Hub ERP items to Shopify by checking “Upload new Bravo Hub ERP items to Shopify”.
You can also update Shopify item upon updating Bravo Hub ERP item.
Following fields are uploaded / updated:
| Bravo Hub ERP Field | Shopify Field |
|---|---|
| Item Name | Title |
| Item Code | SKU |
| Description body | Description |
| Item Group | Product Type |
| Weight per Unit | Weight |
| Weight UOM | Weight UOM |
By default all items are marked as Draft on Shopify and not published in any store.
Purpose of providing this functionality is to sync items with Shopify. It’s not possible to map every fields 1-to-1. Upon creation of item on Shopify using this method, it’s linked with Bravo Hub ERP, this eliminates possibility of duplication. You can modify items on Shopify later to add more details.
Note: This feature is not supported in data import or for variant / template items.
Cancellation of Orders
Section titled “Cancellation of Orders”This connector handles various cancellation scenario in following manner:
- If Order on Shopify is cancelled and it doesn’t have invoice or Delivery note linked against it then Bravo Hub ERP Sales Order is cancelled.
- If Bravo Hub ERP Sales Order does have any linked document, then status of order on Shopify is added to the respective document. Cancellation and preparation of appropriate documents has to be done by user based on this information.